Motley Moose – Archive

Since 2008 – Progress Through Politics

Homemade hummus!

Do you remember the first time you had hummus? Maybe it was at a friend’s house, or at a Middle Eastern restaurant. Its mild nutty flavor, enhanced with lemon and garlic, probably accompanied pita or raw veggies.

If you were hooked, you noticed it in the grocery after that, and you may have picked up an 8-ounce tub for between three to four dollars. It comes in several flavors at the store, with extra garlic, hot stuff, black olives… You may have tried a different kind each time.

But if you’re cheap like me, or if you like making food from scratch so you control what goes in it, like I do, you might hesitate to buy it very often.

You can make hummus from scratch, and pretty easily, too, if you have a food processor. And if you want to step back one more step and use dried garbanzo beans instead of canned, you’ll also need a slow cooker.

Note: garbanzo beans are also called “chickpeas.”

HUMMUS

  • 1 16 oz can of garbanzo beans, or 2 cups cooked beans as below
  • juice of 1 lemon (3-4 tablespoons lemon juice)
  • 1 1/2 tablespoons tahini
  • 2 cloves garlic, crushed
  • 1/2 teaspoon salt
  • 2 tablespoons olive oil
  • cayenne to taste (optional)

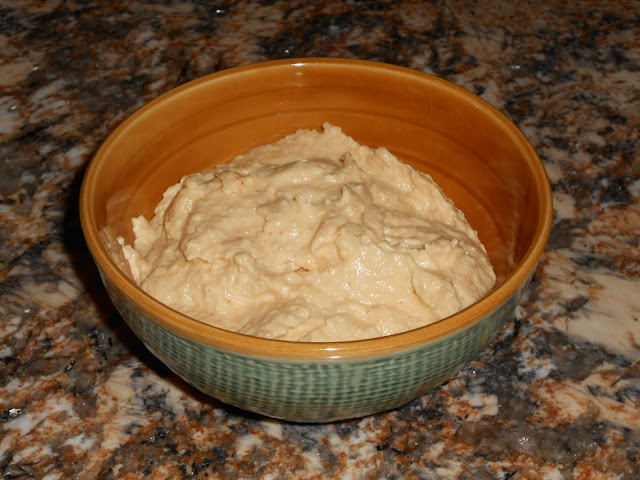
Drain beans and combine in food processor with the other ingredients. Pulse several times until mixed. Scrape sides and blend until smooth*. Empty into serving dish if serving immediately, or into refrigerator dish with cover to store. Serve with warm pita, whole wheat crackers, or fresh vegetables.

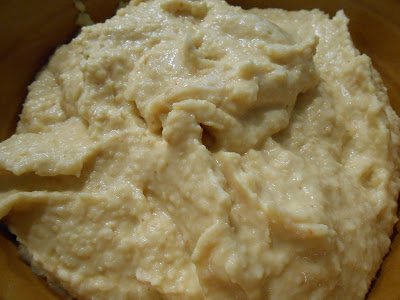
*You can see by this close-up it isn’t really smooth but grainy.

If you want to start with dried garbanzo beans, I’ll refer you to Alton Brown’s expertise. He says to use 1 pound of beans, rinsed and sorted. Place the beans in a 2.5 quart slow cooker with 7 cups of water and 1/4 teaspoon of baking soda. Garbanzo beans do not need to be soaked or pre-cooked first.

Cover and cook on high heat for 4 hours, or low heat for 8 to 9 hours, or until tender. Drain and serve immediately, or use in desired dish.

This makes a lot more beans than your recipe needs! What to do with the extras? Freeze them! Drain cooked beans completely. Portion them into freezer bags in a single layer so the beans don’t clump together when freezing. You can stack several bags on top of each other this way, also.

Jim and I enjoyed my fresh batch of hummus for supper last night, and later today I’ll share with my friend Beth.

Next time I make hummus, I’ll try using the slow cooker for beans, rather than buying canned. Cooking from scratch gives me better control of ingredients, especially sodium, and it is less expensive, too.


13 comments

  1. pittiepat

    home except I use lots more garlic.  I stopped eating green bell peppers years because my digestive track rebelled.  However, I found out that red, yellow or orange peppers bother me not at all.  So, a favorite snack is a nice garlicky hummus and pepper strips.

  2. wordsinthewind

    hummus but my friend makes it and cooks the garbanzos too. I sent her a preserved Meyer lemon I had put up when I was gifted with a sack of them to try in her hummas and she reported it was good. I like the idea of cooking the garbanzos myself because I’m really sensitive to salt and it’s hard to find prepared foods without it.

  3. Kysen

    bit more garlic…annnnd…we toss in a small handful of kalamata olives (minus the pits, of course!).

    We like the ‘pow’ factor of the garlic and ‘briny tang’ factor that the kalamata olives bring.

    We always have some in the fridge (along with a tub of homemade tzatziki sauce…they go GREAT together!).

    I first encountered hummus many many (many) moons ago when following the Dead. It was a common staple on the lot/Shakedown Street (along with bulgur  burgers, falafal, veggie chili, and goo balls).  /grin

    Tzatziki Sauce:

    (kinda like hummus in that much of it is ‘to taste’ and it can differ batch to batch)

    1 large tub of Plain yogurt (we like using Greek yogurt…if you use regular it will just be more ‘wet’)

    1 large English cucumber (again, our preference…they are more dense than normal cukes and not as ‘wet’)

    3-6 garlic cloves (the more the better, imo)

    Dried dill (we use fresh when we have it)

    —-

    – Pour off any excess moisture/fluid from the yogurt and spoon into mixing bowl. (keep the container)

    – Shred the entire cucumber into a colander then ‘press’ it with wadded paper towels to squeegee and wick out as much moisture as you can.

    – Stir the cuke shreds into the yogurt.

    – Finely mince the garlic and dump it in.

    – Add dill ‘to taste’ (I like A LOT of it…wife likes not as much)

    – Stir it all up and stick it in the fridge…once it is chilled through it is ready to eat and it gets better the longer it sits and lets the flavors merge.

    After the first ‘meal’ with it…we store the rest of it right back in the yogurt container.

    *(we don’t add salt…you may find that you want to)

    We use it on salads, on gyros, on veggie burgers, with hummus, with falafal, as a veggie dip and any other way that seems like it might be yummy.

    I’m hungry now.

Comments are closed.