We voted on this series name. If you want to host, please leave a comment. I have been remiss in my cross-posting so one link still goes to the orange place.
I was a little stunned when I took the photos for this diary – especially since I just diaried less than a month ago for this series. I have done a TON of knitting since I moved (which is August 1). Sometimes when I am stressed, I knit. Sometimes I curl up in a ball, but sometimes I knit. It seems I have been knitting.
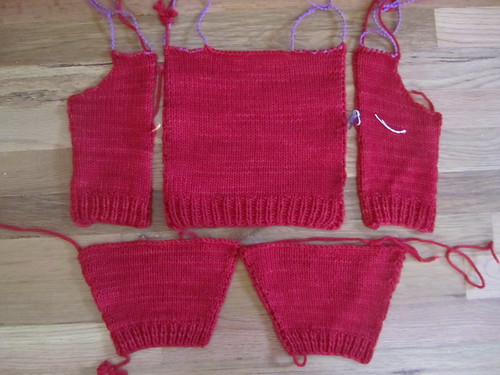
When we last left the baby sweater, it was a pile of pieces and ready to be blocked. I do not have a lot of space for blocking, and I kind of hate threading the blocking wires through the edges, so I worked at my kitchen table while my kids were gone.
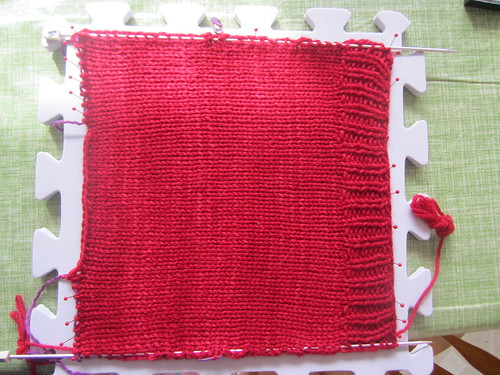
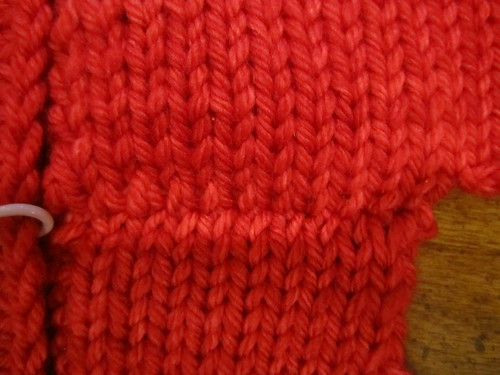
The back was pretty square, and a bit larger than the pattern called for. The blocking wires were threaded through the space between the first column of stitches and the main knitting. The first and last stitches were considered “selvage” and not counted in the main finished measurements. No stitches were slipped, as we sometimes do on the edges of scarves or shawls.
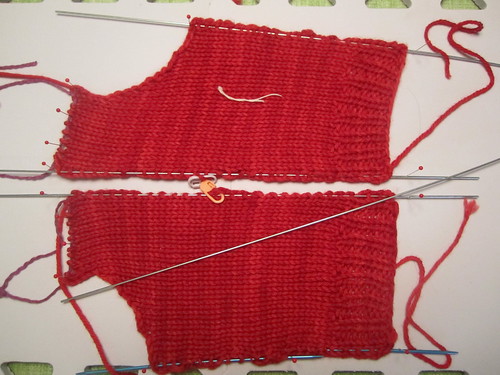
The fronts were also blocked, and I bent one of my long blocking wires in half (it bent back). I also used #2 long needles, again threading through the space between the first and second stitches on each edge.
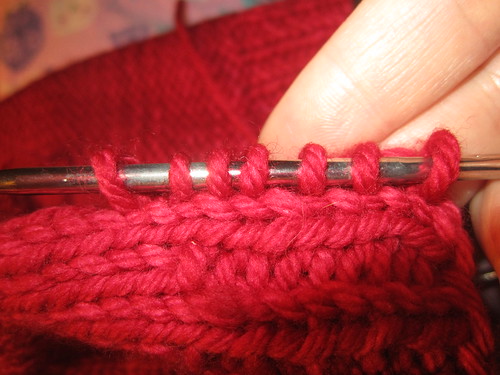
There are three ways to sew together pieces of sweaters. The most fun and easiest way that I prefer is the 3-needle bindoff. I used this technique on the shoulders, where I had the live (non-bound-off) stitches from the back and fronts. These have the purple cotton yarn in them in the top photo. I did not photograph while I was doing this (three needles and the working yarn all in two hands, after all), so I shared Knitty’s feature. I only picked up my camera when I was done, and here is the wrong side, where I just finished – 3 needle-bindoff is done on the wrong side of the work.
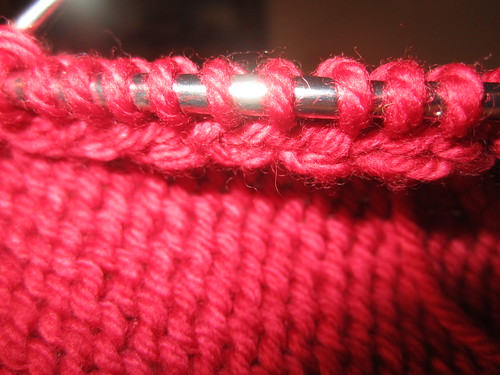
It leaves the tidiest row of stitches all finished! Here it is from the right side, where it looks just like a commercial garment, or better:
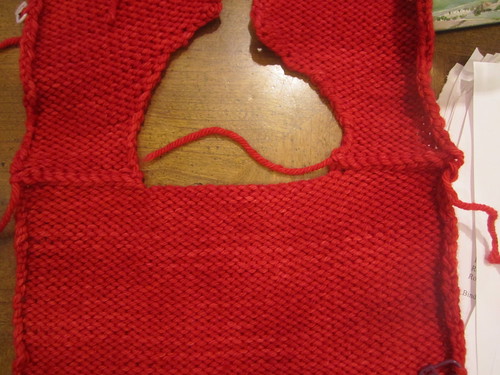
Here are both shoulders done, and the sweater laid out with the back and two fronts:
Then I turned the sweater over to the right side and laid out one sleeve for perpendicular mattress stitch. This is the “vertical” stitches from the top of the sleeve being sewn to the “horizontal” stitches across the (united) body. The stitch markers are to line the edge of the sleeve up to the proper spots on the body, and the middle of the sleeve for placement and even distribution.
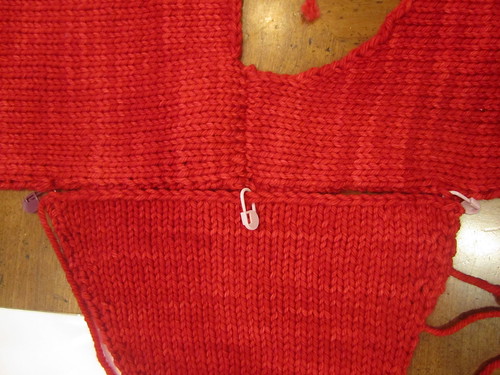
Our pattern had the number of stitches to use, but you can count your way into this as well. There may be ratios of 3 stitches of the sleeve to 4 stitches on the body, where you sew 3 and skip one – it doesn’t seem to leave a hole. And the pattern said to sew the sleeve on before sewing the sleeve closed. I found this “perpendicular” mattress stitch to be relatively manageable.
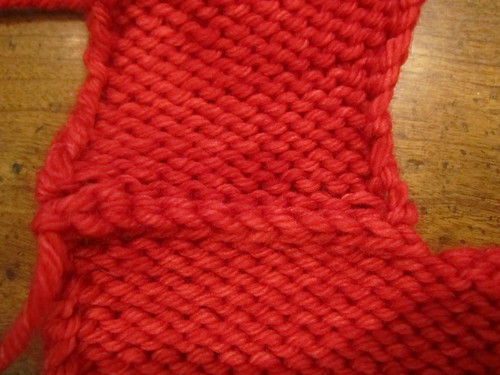
The third and final way to attach sweater pieces together is the parallel mattress stitch, one row to one row. And I am totally buffaloed (no offense to actual buffaloes, who can’t read anyway). In my whole sweater I finished about 2.5 inches:
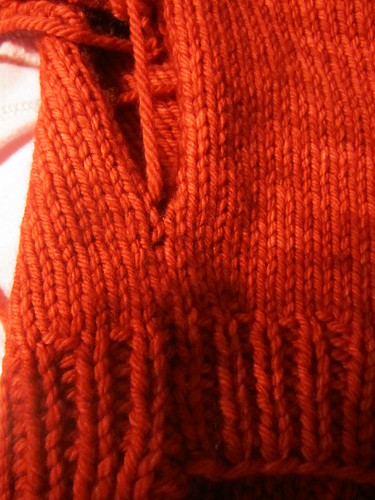
I read about it, I looked at my classmate’s (more finished) items, and I even blocked another project to try the mattress stitch on a single seam. This is still in progress.
Last week’s class was for the finish work of picked up stitches around the neck and button bands. Picking up stitches is really easy when you have your needle in the proper hand (right) and are at the right angles, and remember that you are stabbing through the fabric from the front to the back, wrapping a loop of working yarn around, and pulling it back through. If you are for some reason picking up an entire stitch and working from the front, it is really hard, so don’t do what I did.
Stabbing through:
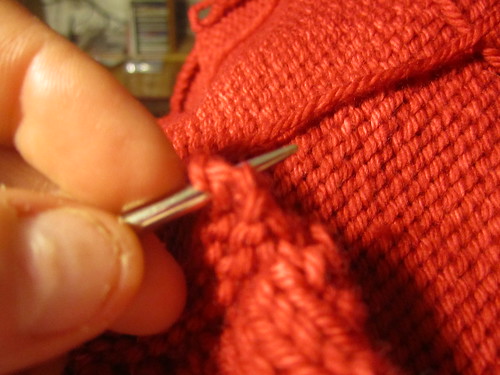
The pattern may tell you the ratio of stitches to pick up. The important part is to have them evenly distributed. And don’t stab into a hole. Stab in to either side of it and squish it up. The 3 to 4 ratio comes into play here too, because we are putting vertical stitches onto a horizontal surface, and the knitted stockinette or garter stitch is not square.
I did notice that both mattress stitch and picking up stitches turns a row of stitches to the back of the fabric. So if your edges are a mess during knitting, it doesn’t matter, because they will end up on the inside of the garment. Here is a photo of the above needle of newly picked up stitches, from the wrong/back side, with the column of edge stitches being turned back:
My instructor, who wrote the pattern for teaching, says to make buttonholes on both sides of the button band – then you know where to place your buttons. I think that works for tiny buttonholes like these. This is the final photo of the baby sweater today.
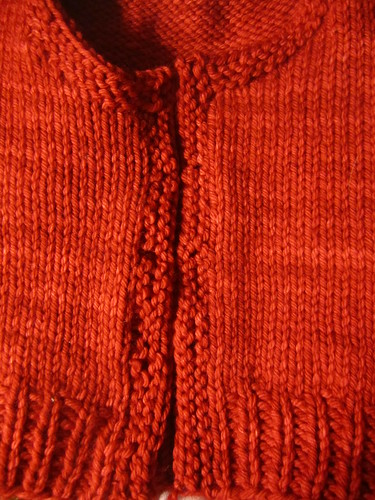
The pattern is called 1-5-1 Baby Sweater and I am using Malabrigio Rios, a washable wool in worsted weight. The next time you-all see this baby sweater, it will be finished. Maybe I will even be able to find a baby the right size to model it for us. I only knit this for the class, I have had no baby in mind. Some of my classmates are worried about their finished sweater fitting a grandchild. Oh, we compared all of our finished sweaters in a stack, and despite all of my sweaters’ problems, it is knit to gauge, and in the middle of the finished sizes. One was very large, perhaps an inch bigger, and that knitter nearly ran out of yarn. One was very small, that knitter had used a finer yarn although I am not sure of her needle size. Not everyone else was finished with their mattress stitches, either, and one lady made a mistake with a pair of scissors and started all the way over. So I was not last in my class, and was probably toward the middle.
What Are You Making?
2 comments